2022 Christmas Card Reveal

It’s that time of year! Time for the Busches annual Christmas card. This is our 22nd Christmas card and it’s pretty pun-ny, if I do say so myself. Ironically I had picked out holiday ensembles for the whole family (I didn’t go shopping for clothes, this is just a conglomeration of stuff we owned) but in the end most of our outfits weren’t even visible in the card! For the record we actually had cute boots and red shoes.

Anyway, drumroll please. Here it is…

Merry Christmas from the Bushes with a “C”. I know it’s cheesy, but it’s supposed to be. I can’t even take credit for this genius idea. Years ago (I’m talkin’, probably 8 years ago) when I was handing out Christmas cards one of SJ’s teachers said “You know what you should do? Merry Christmas from the bushes and be popping out of some actual bushes”. This year I needed that kind of silliness in my life and so we went for it. Only since our name is actually spelled B-U-S-C-H and not b-u-s-h I bought a wooden C to be in the photo with us. When people ask if we are Bush like the president we always have to clarify. No, it’s actually Busch with a C. Or we say Busch like the beer, but I didn’t think that would be a good theme for the card.


Stamp prices are outrageous, but I still like to mail some of our cards to friends and family far away. One of my favorite traditions is when we do the Christmas card assembly line.

However, I also love to hand them out and hear peoples’ reactions. It brings me so much joy to see the smiles and hear the laughter. In the words of Buddy the Elf (which we just watched for the third time this month) “Smiling is my favorite” and also “I don’t care who knows it!”

And one final word to all of the people that don’t send Christmas cards, or just didn’t do cards this year. That is okay! One of the most common responses I got with women my age when they received my card was this look of shame and a confession of guilt about not doing Christmas cards. It’s something I am just as guilty of doing, except not about Christmas cards. I act like this when I  just recently did the same thing when my friend got me a present and I didn’t get her one. Oh the horror. It’s cool though, because as soon as I started trying to explain myself I realized I needed to take the same advice I give to others. When I give a card to someone and they start to apologize about not having a card I always smile and say “You don’t have to give a card to receive one.” I also unnecessarily self-deprecate by explaining how it’s our one and only tradition and I am not really consistent at anything else in my life. I should probably stop doing that. Whether you sent cards or not here is our Merry Christmas to you! I really hope that it’s the best one ever. 


By |2023-07-12T12:39:28+00:00December 21, 2022|Crafts, Family, Laughter, Uncategorized|0 Comments

Messy Mom Christmas Time Finds

I’m a decorate-after-Thanksgiving kind of girl. Which means Christmas time is just two days away and I am SO EXCITED!!!

This week I have a THREE products to promote that will fit right in around the tree this holiday season. One will be perfect to wear when you are hanging out around the tree, one you want to wrap up and put under the tree, and one is actually for the tree!

Let’s start with something I am wearing right now, my fuzzy red Aromasoles.

Aromasoles are a line of super cozy, scent-infused slipper socks that have been flying off shelves for years. All are made with natural therapeutic oils with scents like lavender, rose, cinnamon, and neroli, and they come in an amazing variety of colors!

The aromasoles are my new favorite socks. They are cute, warm, comfy, and smell divine. I recommend picking up a set for yourself and your mom, grandma, teacher, sisters (anyone with feet). They are the perfect companion to watching Christmas Hallmark movies or doing your online Christmas shopping. Speaking of shopping, this three piece gift set is only $20.00. So cute!

Another recent discovery for me is the BlendJet 2.

You may have heard of this amazing portable blender. If not, let me fill you in because I’m loving my new BlendJet. Unlike other blenders, which are uniformly monochromatic in color, BlendJet 2, the original portable blender, is sold in a wide variety of colors – everything from ocean to geode to leopard print.

It’s powerful too – and BlendJet even offers a range of must-have accessories, including 20oz and 32oz jars, insulated sleeves, and carrying totes.

I love so many things about the BlendJet 2. It’s so perfect not just for smoothies but other items that I would use a food processor for. I’m really not a fan of battery operated cordless items, because the cost of replacing batteries adds up quickly, but the BlendJet 2 is rechargeable. 


The cord is a USB too so you can plug it just about anywhere.

I’m thrilled with my new BlendJet and I know it would make a great gift for a college student, health enthusiasts, or any family that is on the go a lot.

The last item I want to rave about is The LightKeeper Pro and LED Keeper .

This time I’m not talking about something for under your tree, but for if something goes wrong with your tree! With just the press of trigger, these tools can fix broken holiday lights – so you can make sure your decorations are always colorful. If you already decorated and noticed some faulty bulbs grab the Light Keeper Pro today, or if you are like me and are about to throw your tree up you can have it on hand and use it year after year. This gadget has been featured on NPR, USA Today, Real Simple, even Steve Harvey! Every home needs a Light Keeper Pro.

I hope everyone has a wonderful Thanksgiving, a successful Black Friday, and a delightful Holiday season all the way around!


By |2022-11-22T15:51:37+00:00November 22, 2022|Crafts, Family, Home, Projects, Uncategorized|0 Comments

Farm Party Highlights

I gave some behind the scenes planning details as I was busy preparing for the ultimate farm/3 Little Pigs party. I also shared the elaborate farm theme menu. Still, there is SO MUCH more that I haven’t had a chance to reveal about how Ezie’s third birthday panned out.

Ezies 3rd birthday

My brother sent me some previews from the multitude of photos that he has (and a I have few that I took myself). I am sure I will do some tutorials and craft related posts later, but for now I can’t help but pass along the highlights that I do have. This was one of the best parties I have ever thrown. I am so grateful that the weather cooperated and that we have so many laid back creative friends that could get into such a silly theme party! It was the best.

As I already mentioned the theme was farm, which was so perfect for a fall birthday party. We had a little photo, prop, and costume area that was a lot of fun.

IMG_6246

IMG_6264

Sedonna_Horse1_Sm

I also came out dressed as a cow at one point (the things we do for our kids) and told the story of The Three Little Pigs, with help from some volunteers. I’ll have more pictures of that later, but for now here is a pic of the cutest big bad wolf you’ve ever seen!


BigBadWolf_Sm

We then had a house building contest and I think the kids could have spent days messing around with those cardboard boxes. The creativity was so impressive and it was such an economical game. I highly recommend this activity whether you are having a birthday party or not.


SedonaLindsey_Sm

EliseEthan_Paint

Hanna_Sm

NeighborKiddos


IMG_6413

Okay, last one. I made party favor bags for each family instead of every kid this time. I already had the brown paper bags and I printed out the barn so I didn’t even have to buy any supplies. I also made printable stick figure families to glue inside the barns that I cut to allow for open and shut doors.

IMG_6421

Like I said I’ll post more at some point, but when I got the email with those photos I couldn’t keep all the cuteness to myself!

By |2018-12-14T10:05:26+00:00October 26, 2015|Crafts, Creativity, Parties|14 Comments

Broken Jewelry Decor


I’m all about birthdays this week. Remember the tea party from last March?

IMG_9075

I do and I will never forget it and how special it was!

IMG_9206

One of the things I shared when I blogged about the decor was this simple wooden letter S. It was a nice little addition to the party theme, but unlike the piñata and the desserts that I talked about yesterday this is a piece of art that we get to keep!

IMG_9045

I have a cute story about this S that has traveled to a new place in our home. SJ got her own room yesterday. We were waiting to find out the gender of the baby to decide how to split the rooms up in the new house. Then when we learned we are having a girl we still had a bunch of boxes in the room to unpack. Finally we got the room straightened out when  my in laws came to visit this past weekend. That was the motivation we needed to set up a bed in there. After they left yesterday SJ moved in. We still haven’t really moved any of her stuff, but she wasted no time getting her toys, a photo of herself, and this letter S.


IMG_9459


She is so proud of the new room. I would share pics, but I don’t have any since at this point it is really not much to look at. The thing that cracked me up was the moment she got home from school and started setting up camp in her new room I overheard her yell “Ezie get out my room!!!” It was the first thing she said, almost immediately after she claimed that territory. Ahhh, siblings.

She slept through the night in there all by herself which is saying a lot because she is 5 1/2 and she has never been in a room by herself. Her and her brother have shared since day one.

Anyway, I bring all this up because that lovely letter S that she cherishes so much was a super easy DIY project and you can make one too! All you need is a wooden letter, some old jewelry, hot glue, and some fabric. The whole tutorial is over at Little Dove Creations today! Stop by Little Dove Creations to see all the details.

By |2015-09-09T23:45:32+00:00September 9, 2015|Crafts, Parties|1 Comment

A Homemade Birthday


IMG_6190
I wasn’t going to do anything major this year for Z’s birthday because of the baby on the way and all that. So I kept his party pretty low key… kind of. I mean, I didn’t have a theme so that should be proof that I did use some restraint! I did however get a bit crafty with certain aspects of the party and I think it went really well. Z was so happy and his reaction to all of the surprises that I made for him was totally worth the effort!

He said his favorite part was the piñata.

IMG_6028

This is the third Piñata I have made for his birthday and it was pretty simple because it was just a box made to look like a  Minecraft Creeper. Everything in Minecraft is made up of pixels so cutting tissue paper out in squares may have been tedious, but the design was very basic.

minecraft-creeper

Everyone got a turn to whack and smack the creeper with a plastic bat.

IMG_6093

Even after all the candy flew out they continued to play with it and the boys got to be boys as they tore the Minecraft enemy to bits. They made it look so fun I thought I might need to take up piñata fighting as a hobby.

IMG_6133

The funny thing is all of my “art work” for the party are things that are meant to be devoured or destroyed, but I don’t mind. I prefer to get a picture before hand, but I am totally cool with how temporary it all is. The memories are what last.

Z also had a big cake with Mario popping out of the top.

IMG_6203

I cheated with this cake because I bought the chocolate fudge cake pre made from Kroger and then just made a confetti bunt cake and stacked it on top. I covered the whole thing with store bought chocolate frosting and stuck Mario in the middle of the bundt cake. It was far from pretty or perfect, but Z loved it. The kids ate the bundt cake in a matter of minutes and our family has been snacking on the leftover fudge cake which everyone agrees is capital D-licious. I definitely considered this cake a success!

Lastly, Z really loves fruit pizza and we have had some fun creations in the past, so I knew I wanted celebrate this occasion by making one of his favorite characters out of fruit.

IMG_5943

Emmet from the Lego movie was a natural choice. Z loves Legos and it’s kind of like the Minecraft character because when you are working with things made from cubes (or Lego bricks in this case) the shapes are way easier to replicate than with something found in nature. The fruit pizza was not only super fun to make and to surprise Z with, but it really is so yummy! Seriously, everyone always goes on and on about how amazing these simple sugar cookie fruit creations taste. I have the recipe here.

IMG_6176

So that was pretty much the party other than lots of food and 14 children ages 1-8 running around slipping and sliding for two hours. It was a perfectly chaotic, wild, and messy time. I love having some family traditions like these. Casual, frugal, homemade fun. Next up Ezie’s birthday!

By |2015-09-08T22:06:07+00:00September 8, 2015|Crafts, Creativity, Parties, Projects, Uncategorized|2 Comments

Paper Plate Cow Masks


easypaperplatecowmasks

My family LOVES Chick-fil-A Cow Appreciation day. I can never remember to dress my children in green on St. Patrick’s Day, but not a summer goes by that we don’t participate in a holiday made up by a fast food chain that allows you to get free food!

Whether you are looking for an easy way to get a free meal on July 14th, or you have a school play to dress up for, or maybe you are just looking for a fun craft, these DIY paper plate masks are so simple. You may have all of the supplies on hand, if not they are cheap and easy to find.

supplies


Supply List

Paper Plate

One sheet of pink, black, and tan/brown construction paper

Scissors

Hole punch (or just use scissors or something sharp)

Black marker

Glue/and or tape

String (preferable elastic)


First cut out a 5 inch triangular shape out of the plate for the mouth. It will be close to a fourth of the plate.

plate cut


Next cut an oval out of the pink paper to be used for the nose. It will be slightly smaller than the widest part of the mouth. About 4 inches. Then draw two ovals for the nostrils.

pieces

You will also fold the tan paper in half to cut out two identical horns about 3 inches long. Then some ears made of black paper that is a pointy oval shape, along with the same shape in pink that is about an inch smaller.

IMG_7538

Cut holes for the eyes (put the mask on to pencil in the approximate width) and punch holes for the string.

toddler

Lastly, glue or tape all the parts into place and tie your string into the holes.

mask
Now you are ready for the fun to begin!
supe cow

Enjoy your new mask!

By |2015-07-07T17:43:52+00:00July 7, 2015|Crafts, Frugal Living|8 Comments

Free Donuts!?

I have been working hard to cut back sugar for our family this year. Each month another sweet treat is eliminated from the menu in our home and will no longer be restocked, but one thing I don’t think I will ever make completely off limits is donuts.

Did you know that National Donut Day is TOMORROW!? I didn’t, but it turns out it’s a thing.

national-donut-day


 Be sure to stop by your local Krispy Kreme or Dunkin’ Donuts to get a free donut Friday June 5th!

I know that Dunkin’ Donuts will require a drink purchase, but they have excellent coffee. I will be ordering my favorite, which is the cool and sweet Iced Caramel Latte with Whipped cream.

dunkin-donuts-iced-latte

There is a party in my tummy. So yummy. So yummy…

 Speaking of parties, a lot of the party ideas that we implemented SJ’s 4th birthday would be perfect for donut day or a variety of occasions.

Pinata

Check out the party post HERE to see how my DIY donut invitations, donut hole fruit kabobs, and donut piñata turned out.

DonutTable-731x1024

You can also head over to my donut party pinterest board for even Donut fun like:

Donuts for elves (they are actually cheerios). So cute!

donutbos

Or stamping colorful thumbprints for donut sprinkles.

7ef0bee95d9a0f2bc718fbbfa680891a

“If You Give a Dog a Donut”  might be fun reading material for your kids this weekend.

WceGgDUNlCA8RPHOz66AbHHs4RI12Vqg+OoBRGBrKx0gjMb1TSGn63!P3!BaM61Ycim7TPw2yzIaTKEqk4wNnPi0KqNZzE1wNbi6ssfXykdQ5iDKyCBWtzAWMsmQ+7PK

There are so many possibilities! I realize we have a health epidimec in our society so maybe I shouldn’t be promoting a day that celebrates what is possibly the least nutritious snack of all time disguised as a breakfast food. But there are actually a lot of alternative recipes out there for vegan, gluten free, paleo, and keto donuts. Because regardless of your dietary needs I think every one deserves something sweet from time to time, “donut you think? “

Do you have a favorite donut?

By |2015-06-04T09:28:33+00:00June 4, 2015|Crafts, Creativity, Frugal Living, Parties|5 Comments

Paper Bag Masks

I don’t know about where you live, but it’s been cold and wet here. J brought home some paper bags not that long ago that he thought the kids could make masks out of. It was snowy at the time that we did this activity, but it occurred to me that’s also perfect for rainy indoor fun year round.

You’ve probably seen this craft before, or maybe remember it from your childhood. It’s not the latest thing, but it was new to the kids and they had a blast!

We decorated brown grocery store bags with paint (and some stick on circles that we had on hand) and cut out spaces for the eyes and shoulders. It’s a little bit messy if you decide to use paint, but it really couldn’t be any simpler.

My over achieving seven year old wowed us when he decided to cut the circles I gave him for eyes and turn them into ears for his tiger creation.


The other two kids were a little more uh… eccentric with their techniques.


In fact they were so heavy handed with the paint we ended up blowing drying the bags so that they could wear them that night.


Z eventually finished up (both front and back) using a mixed media approach.

When I posted these on Facebook I had someone ask where we found plain paper bags. Of course you can get paper bags anywhere, but they often have print on both sides. In this case we went to Meijer (a midwestern grocery store). I’m sure you can find them other places too though if you are on the look out.


You can see the snow on the porch!Next time we do this project I will definitely be more strategic with where I put the eye holes. The poor things were peaking out of one side the whole time.

Z’s turned out so great. He did it all on his own too.


The cool thing is it isn’t just one time use. The bags fold up for easy storage and then you can pull them out for endless fun whenever you want!
Hooray for paper bags!
By |2015-05-18T04:09:41+00:00April 24, 2015|Crafts, Creativity|6 Comments

Ice Cube Treasure Hunt

I was right! Yesterday school was cancelled and today too. What is one to do with all that snow and time off? How about a Treasure Hunt?

I just happened to be scrolling through my Facebook early in the morning, before the kids woke up and a friend posted a picture of some ice cube trays full of colorful ice and said she was going to hide them in the snow for a little scavenger hunt.

 I immediately fell in love with the idea and already had the necessary supplies on hand

Water
Ice cube trays
Food coloring
A snowy area

So I filled our Ikea ice cube trays with water and added food coloring to each one.

Then I put them in the freezer for four hours.

I was going to hide them in the snow, but that ended up not being necessary. I just picked out a living room size area in the ground and tossed the ice cubes up in the air, letting them land where they may.

The only problem was, we had 6 inches of snow and each ice cube sank like a rock being swallowed up into the white abyss. This heart shaped one was one of the only one I could take a photo of because the rest were completely invisible. 

It still worked out though. My little excavators immediately went to work looking for the rainbow treasure.

I helped point them in the right direction and showed them how to look by kicking through the snow and stopping when they spotted bright colors.

The challenge level with this amount of snow would probably be great for a youth group or even adults! Even though it was tricky for my group, and we only ended up collecting about half of the ones I made, the kids still really enjoy the whole experience.

They got so excited each time they discovered another fish, star or heart. The great thing about the whole idea of using ice is that the ones we couldn’t find are just going to melt away or maybe be a fun discovery for one of our dog walking neighbors.

If your kids are some of the thousands throughout the country experiencing back-to-back-to-back snow days then you may want to consider this fun little outdoor activity. It’s so easy, I threw it together without any preplanning at all! I will admit that next time I’ll ease up on the food coloring. I just used way too much and it got pretty messy. It washes off though, so it’s no big deal, but next time one drop will do.

All in all this was a perfect outdoor snow day activity that is fun for any age level. We’ll definitely do this one again some time.

Now time to warm up with some toasty hot chocolate and a hot bath! 
By |2015-05-18T04:19:18+00:00February 19, 2015|Crafts, Creativity, Uncategorized|6 Comments

Valentine’s Craft

I know I titled this as a “Valentine’s craft”, but love and hearts are in style year round, which makes this project extremely versatile.  You could help your child decorate a card for grandma, you could make a nice painting to frame and hang, or you could use it as an object lesson while teaching Bible verses about love. It’s inexpensive creative fun, and my favorite part is that it could work for almost any age. 
All you need is some paint, paper, bowls, and a couple empty paper towel or toilet paper rolls.
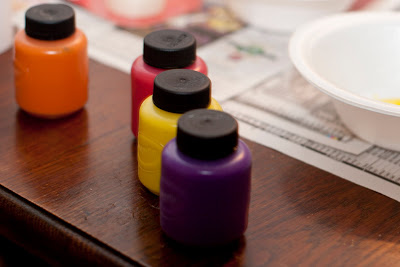
1. Choose your paint. I used Crayola washable paint and narrowed it down to 4 colors.
2. Pour a tablespoon of the paint into a bowl. 
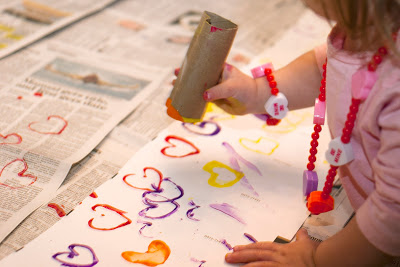
3. Have the child bend the tubes into the shape of a heart and tape each one into place to help them hold their shape. I used a paper towel roll and cut it into thirds.
4. Dip the rolls into the paint and use them as stamps. That’s it! 
You still have plenty of time before valentines day to start collecting those cardboard tubes. I will warn you that this craft can get a little messy, 
but the Crayola washable paint boasts that it is “washability you can trust” and it is. We’ve never had any trouble with it staining clothing, furniture, or anything else. 
 I hope your children enjoy this craft as much as mine do. 
Today I am linking up with the #showmethelovelinkup over at The Loflands
I would also like to say thank you to Rust and Sunshine for this fun craft idea. Lastly, I wanted to mention that these photos are a few years old (2012) and I have featured this craft before, but it’s such a hit I wanted to share it again. 
By |2015-05-18T04:21:51+00:00January 29, 2015|Crafts, Creativity, Uncategorized|11 Comments
Go to Top