

FaceBook to the Rescue
My whole world turned upside down when we decided to sell our house and leave the place we’ve called home for the first 11 years of our marriage. Then my computer turned upside down when it fell off the bed! The good news is it was under warranty, the bad news is I lost my entire hard drive. I have come a long way when it comes to making back ups, so all of my work related data and personal files were covered except for November and December because I slacked off in the middle of getting ready to move.
As I was getting ready for SJ’s 2nd birthday I wanted to catch up on our family albums and her baby book, but I have no evidence of any family pictures that were downloaded November or December of 2012! That means I lost pictures of my sons graduation from the church nursery,

my kids in their adorable halloween costumes,

and our last Christmas before we left Texas.

That’s when I went to Facebook. I knew I had uploaded all of these events to share with friends and family, but would they be printable?
What a lot of people don’t realize is that web resolution and print resolution are two totally different things. When I worked for Now Magazine I would ALWAYS have people tell me we have lots of pictures on our web site, just pull them off there. And most of the time they were TOO small. Things can look great on the online at 72 dpi, but to look good in print they need to be around 300 dpi. I know it’s confusing, but just because it looks good online does not mean you can print it.

However, Facebook has an option when you upload photos to post them at high quality and I strongly recommended checking that box, because thanks to the photos I posted on Facebook I have been able to print out all the special memories that would have been lost otherwise.
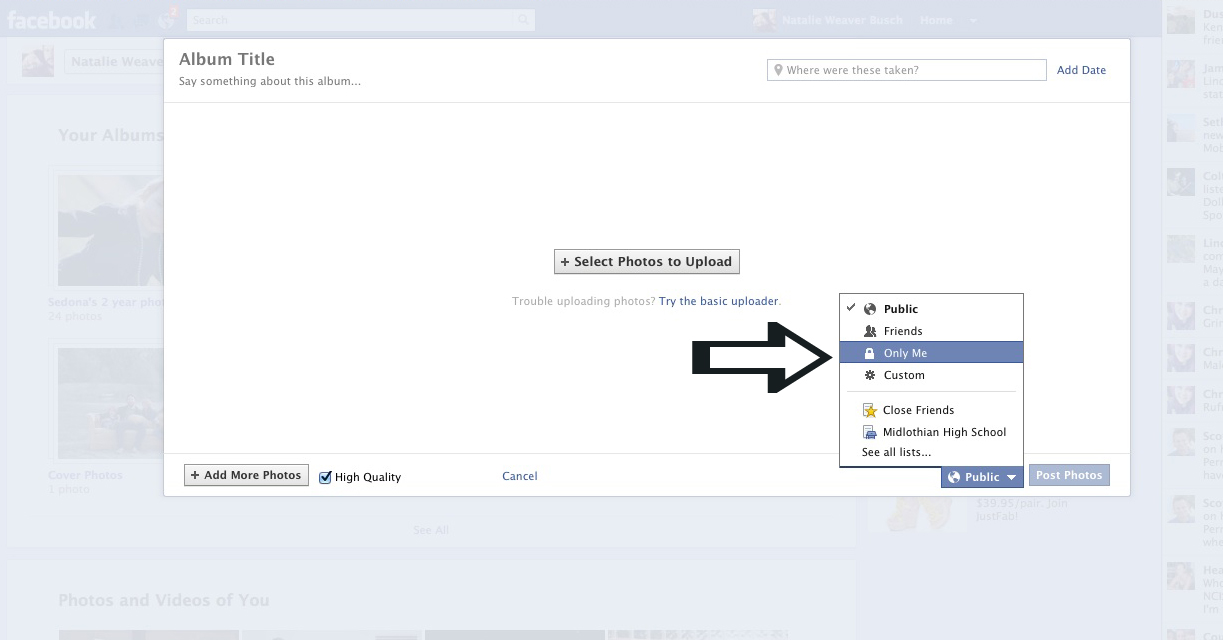
Here’s how to upload your photos.
1. Go to your photo albums and click the button that says add photos.

2. In the bottom left corner there is a box that says “high quality”. Check that.

3.On the right there is a drop down menu that says “public” and when you click on it you can customize who you want to be able to see the photos. If you don’t necessarily won’t to post the photos to your home page then you can select “Only me” and no one else will be able to view your photos, but they are there if you ever had a computer crash like mine did.
After that you just select the photos you want to upload and publish your album.
I am not suggesting that you use Facebook as your primary storage device. First of all I can’t guarantee they won’t delete your whole account tomorrow, and I am not even sure what the maximum number of uploads is. You should always back up your images through discs or time machine, external hard drives, carbonate, etc., but it’s nice to have multiple locations for your most treasured moments and in my case Facebook really saved the day.
Thank you social networking!